Bootstrap Menu Styles
Intro
Even the easiest, not talking about the much more complicated pages do need certain kind of an index for the visitors to conveniently navigate and identify what they are searching for in the early couple of seconds avter their coming over the page. We must always have in thoughts a customer might be rushing, searching many webpages quickly scrolling over them trying to find an item or choose. In these particular cases the clear and well stated navigational selection might actually make the contrast between one unique site visitor and the web page being actually clicked away. So the construction and behaviour of the web page navigation are essential in fact. On top of that our web sites get increasingly more observed from mobile phone so not having a web page and a site navigation in special acting on smaller sreens nearly equals not possessing a webpage anyway or even much worse.
Luckily for us the new fourth edition of the Bootstrap system offers us with a highly effective device to manage the case-- the so called navbar component or else the menu bar people got used checking out on the tip of many webpages. It is a useful still efficient instrument for covering our brand's status relevant information, the pages building and a search form or else a few call to action buttons. Why don't we see precisely how this whole thing gets done within Bootstrap 4.
Tips on how to employ the Bootstrap Menu Styles:
First off we want to have a
<nav>.navbar.navbar-light.bg-fadedbg-inverse.navbar-inverseYou are able to likewise utilize one of the contextual classes such as
.bg-primary.bg-warningOne more bright new element introduced in the alpha 6 of Bootstrap 4 system is you must also specify the breakpoint at which the navbar will collapse in order to get featured as soon as the selection button gets clicked. To work on this provide a
.navbar-toggleable- ~the desired viewport size ~<nav>Second action
Thereafter we ought to set up the so called Menu switch which will appear in the location of the collapsed Bootstrap Menu Styles and the visitors are going to utilize to carry it back on. To perform this set up a
<button>.navbar-togglerdata-toggle =“collapse”data-target =“ ~ the ID of the collapse element we will create below ~ ”.navbar-toggler-rightMaintained web content
Navbars arrived using embedded help for a variety of sub-components. Select from the following as wanted :
.navbar-brand.navbar-nav.navbar-toggler.form-inline.navbar-text.collapse.navbar-collapseHere is actually an instance of all of the sub-components involved in a responsive light-themed navbar that automatically collapses at the
md
<nav class="navbar navbar-toggleable-md navbar-light bg-faded">
  <button class="navbar-toggler navbar-toggler-right" type="button" data-toggle="collapse" data-target="#navbarSupportedContent" aria-controls="navbarSupportedContent" aria-expanded="false" aria-label="Toggle navigation">
    <span class="navbar-toggler-icon"></span>
  </button>
  <a class="navbar-brand" href="#">Navbar</a>

  <div class="collapse navbar-collapse" id="navbarSupportedContent">
    <ul class="navbar-nav mr-auto">
      <li class="nav-item active">
        <a class="nav-link" href="#">Home <span class="sr-only">(current)</span></a>
      </li>
      <li class="nav-item">
        <a class="nav-link" href="#">Link</a>
      </li>
      <li class="nav-item">
        <a class="nav-link disabled" href="#">Disabled</a>
      </li>
    </ul>
    <form class="form-inline my-2 my-lg-0">
      <input class="form-control mr-sm-2" type="text" placeholder="Search">
      <button class="btn btn-outline-success my-2 my-sm-0" type="submit">Search</button>
    </form>
  </div>
</nav>
Brand
The
.navbar-brand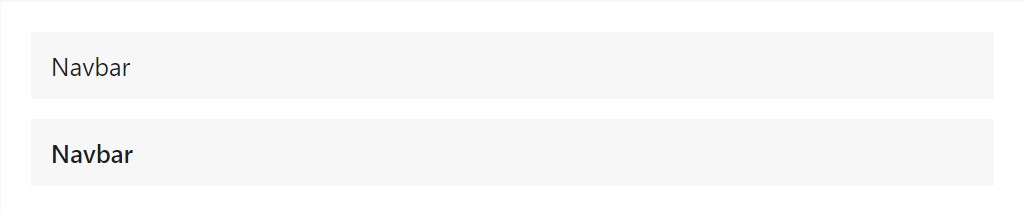
<!-- As a link -->
<nav class="navbar navbar-light bg-faded">
  <a class="navbar-brand" href="#">Navbar</a>
</nav>

<!-- As a heading -->
<nav class="navbar navbar-light bg-faded">
  <h1 class="navbar-brand mb-0">Navbar</h1>
</nav>
Nav
Navbar navigation urls based on Bootstrap
.navActive conditions-- with
.active.nav-links.nav-items
<nav class="navbar navbar-toggleable-md navbar-light bg-faded">
  <button class="navbar-toggler navbar-toggler-right" type="button" data-toggle="collapse" data-target="#navbarNav" aria-controls="navbarNav" aria-expanded="false" aria-label="Toggle navigation">
    <span class="navbar-toggler-icon"></span>
  </button>
  <a class="navbar-brand" href="#">Navbar</a>
  <div class="collapse navbar-collapse" id="navbarNav">
    <ul class="navbar-nav">
      <li class="nav-item active">
        <a class="nav-link" href="#">Home <span class="sr-only">(current)</span></a>
      </li>
      <li class="nav-item">
        <a class="nav-link" href="#">Features</a>
      </li>
      <li class="nav-item">
        <a class="nav-link" href="#">Pricing</a>
      </li>
      <li class="nav-item">
        <a class="nav-link disabled" href="#">Disabled</a>
      </li>
    </ul>
  </div>
</nav>
Forms
Situate different form regulations and elements inside of a navbar utilizing
.form-inline
<nav class="navbar navbar-light bg-faded">
  <form class="form-inline">
    <input class="form-control mr-sm-2" type="text" placeholder="Search">
    <button class="btn btn-outline-success my-2 my-sm-0" type="submit">Search</button>
  </form>
</nav>
Text
Navbars may likely feature bits of text with help from
.navbar-text
<nav class="navbar navbar-light bg-faded">
  <span class="navbar-text">
    Navbar text with an inline element
  </span>
</nav>
One more component
Another bright new feature-- in the
.navbar-toggler<span>.navbar-toggler-icon.navbar-brandNext we need to develop the container for our menu-- it is going to develop it in a bar together with inline things above the identified breakpoint and collapse it in a mobile view below it. To do this create an element with the classes
.collapse.navbar-collapse.collapse.navbar-togglerLast aspect
Finally it is definitely moment for the real navigation menu-- wrap it within an
<ul>.navbar-nav.nav<li>.nav-item.nav-linkConclusions
So typically this is simply the construct a navigating Bootstrap Menu Template in Bootstrap 4 need to carry -- it's rather basic and user-friendly -- promptly everything that's left for you is thinking out the appropriate structure and attractive titles for your content.
Check several youtube video guide relating to Bootstrap Menu
Linked topics:
Bootstrap menu main records

Mobirise Bootstrap menu
Bootstrap Menu on the right side
